


Data is the lifeblood of your business, but it is only useful if you can access it. In many ERP systems, pulling a custom list of transactions requires a call to an expensive developer. Acumatica changes that with Generic Inquiries (GIs).
Think of a Generic Inquiry as asking Acumatica a precise question and getting a real-time spreadsheet as an answer. Whether you need to build dashboards, export data to Excel, or feed Power BI via OData, GIs are your ultimate starting point.
Here is a step-by-step beginner’s guide to extracting exactly what you need without writing a single line of code.
Step 1: Hunt for Your Back-End Data
Acumatica stores data in Data Access Classes (DACs), which act as the back-end database tables. Before creating an inquiry, you must identify which table holds your data.
Fortunately, you do not have to guess. You can find the right tables using Acumatica’s built-in Inspect Element tool:
1. Navigate to the screen containing the data you want (e.g., the Invoices and Memos screen).
2. Click CUSTOMIZATION in the top-right menu and select Inspect Element.
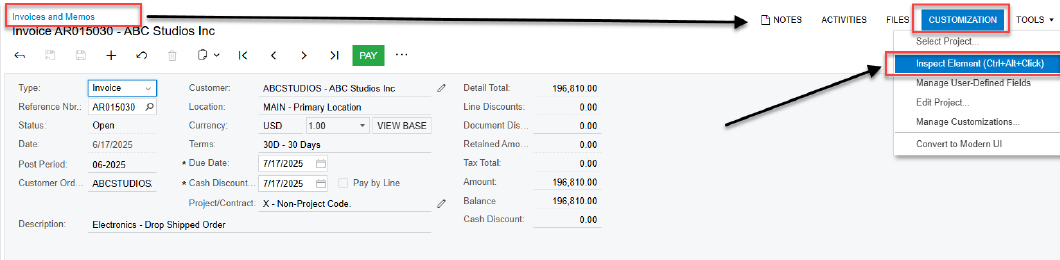
3. Click on the specific data field you want to extract.
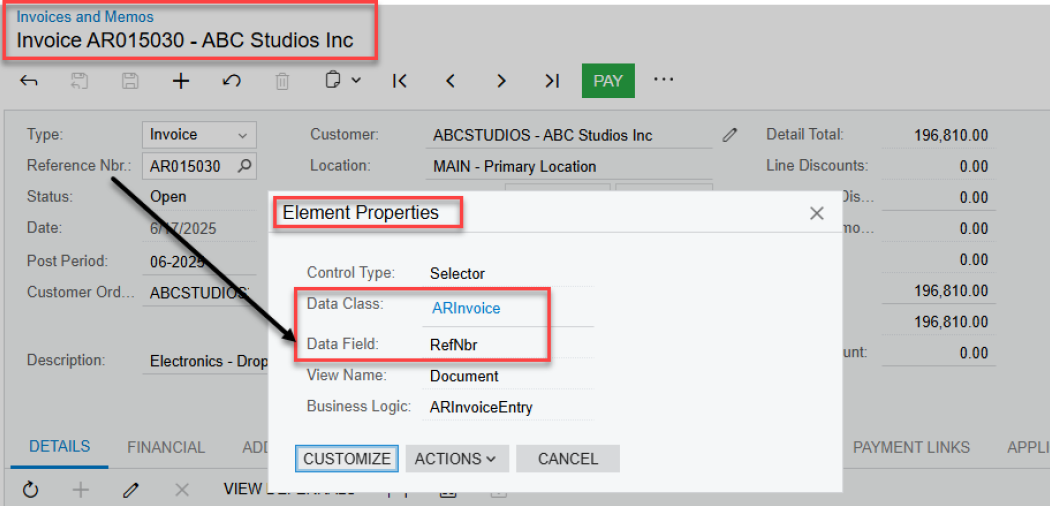
4. A popup window will reveal the exact Data Class (table name) and Data Field name.
Tip: For instance, if you look up invoice data, you will discover the primary table name is ARInvoice.
Step 2: Create a New Generic Inquiry
Now that you know your source table, you can build your query.
1. Use the universal search or go to Customization > Generic Inquiry.
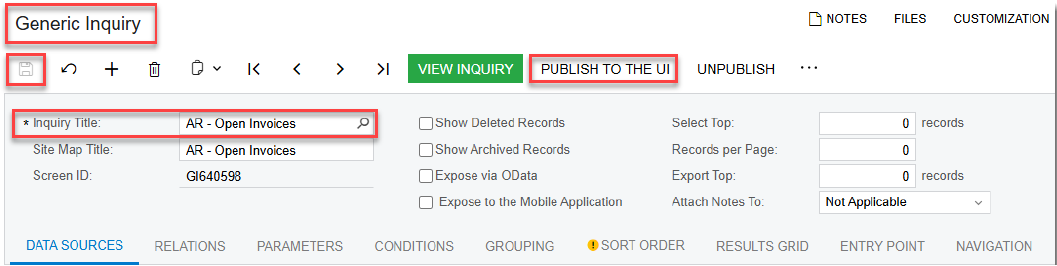
2. Type a clear name in the Inquiry Title field (e.g., AR – Open Invoices).
3. Click the Save icon on the top toolbar.
How to make it show up in your menus:
Instead of typing menu paths into text boxes, click the PUBLISH TO THE UI button located on the top toolbar. A popup wizard will open, allowing you to visually choose the exact Workspace and Category sidebar location where you want this report to live.
Step 3: Add Your Tables (The Data Sources Tab)
Next, tell Acumatica where to look for the data.
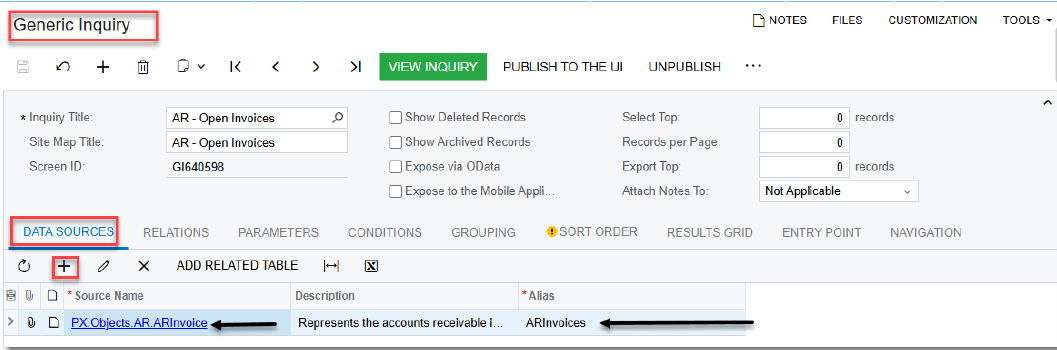
1. Click the very first tab labeled DATA SOURCES.
2. In the grid below, click the + (Add Row) icon.
3. Search for your primary table (like ARInvoice) under the table column and select it.
4. If you only need data from this single table, skip to Step 4.
Need data from multiple places? If you want to pull customer information along with the invoice, you will need a second table, like Customer. Use the RELATIONS tab right next to Data Sources to link your tables together using common database keys.
Step 4: Choose Your Fields (The Results Grid)
The RESULTS GRID tab defines the columns that will show up on your final report.
1. Click the RESULTS GRID tab.
2. Click the + icon to add a row.
3. Select your active Table under Object and choose the specific Data Field you want to display (such as RefNbr, DocDate, or OrigDocAmt).
4. Use the Caption column to give your field a clean, human-readable label (e.g., changing RefNbr to Invoice Number).
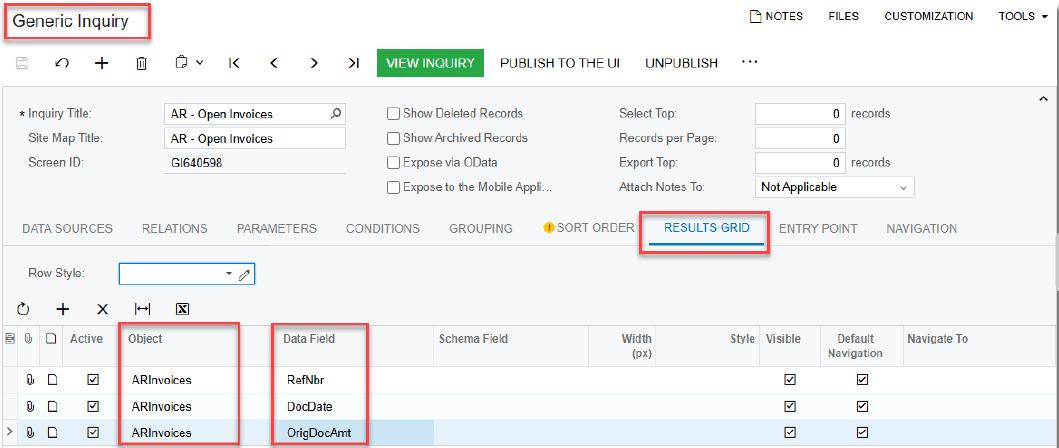
5. Click the Save icon on the top toolbar.
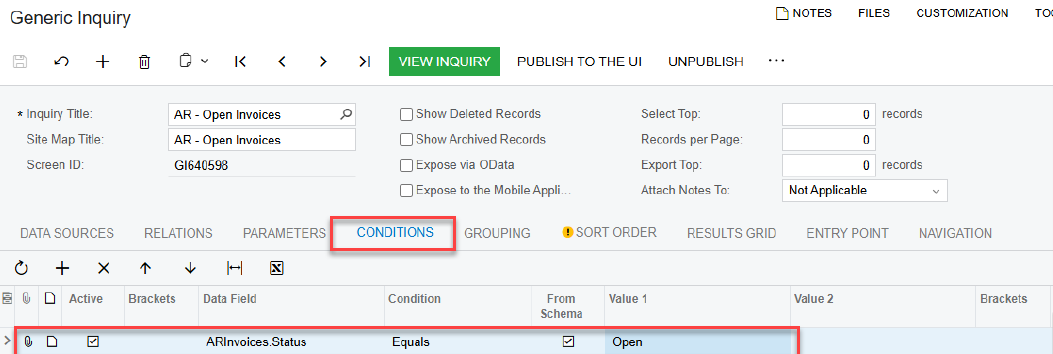
Step 5: Filter the Noise with Conditions
A good report only shows relevant information. To avoid pulling thousands of historic, closed records, use the CONDITIONS tab.
• Filter by Status: Set a condition where ARInvoice.Status equals Open to keep your list actionable.
• Filter by Amount: Set a condition where ARInvoice.OrigDocAmt is greater than a specific value.
• Filter Dynamically: Use parameters like @Today or @MonthStart to ensure your report stays updated relative to the current calendar day.
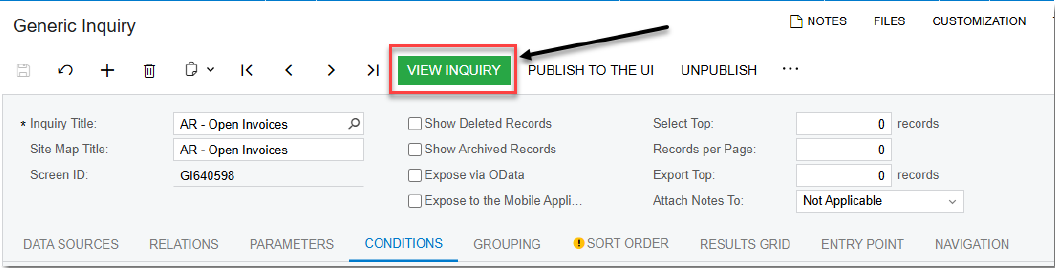
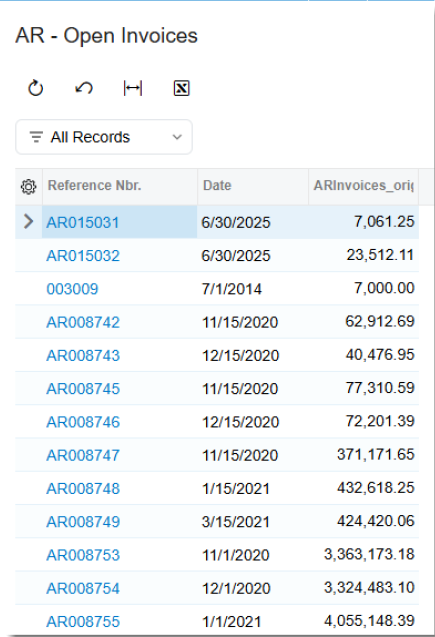
Step 6: Preview Your Work
Once your configurations are set, click the bright green VIEW INQUIRY button on the top toolbar. This will instantly launch your live report in a new view, letting you confirm that your columns look clean and your filters are working perfectly.
Next Steps: Unleash Your Data
A finished Generic Inquiry is highly versatile. You can click Export to Excel from the final report view to instantly analyze your records. On your setup screen, you can also check the Expose via OData box. This creates a secure live feed, allowing power users to pull real-time Acumatica data directly into Microsoft Power BI or Excel dashboards.
Credits & Legal Notice
• Copyright (c) Agile Consulting, Inc.
• Author: AG Ghazali, MCP, MCTS
• Website: www.agile-usa.com
CRM Sage: Driving More Value for Your Business
Sage CRM Workflow: Turning Manual Tasks into Peak Productivity
Free vs. Paid CRM Solutions: Which Is Good for Your Business
Sage CRM Training: Empower Your Team to Get the Most from Your CRM Investment
How Sage CRM Can Overcome Your Sales Slump and Lead to Sustainable Growth